







1. Why UV Adhesive Is Different from Everything You Know
If you‘ve been applying lash extensions with traditional cyanoacrylate glue for years, the UV system feels like learning a new language.
Traditional glue cures through humidity. You place the extension, wait 5–30 seconds for the adhesive to set, and hope the room‘s temperature and humidity are in the right range. If they aren‘t, you fight the glue all day. This process relies on anionic polymerization triggered by moisture, meaning ambient humidity must remain within approximately 45–65% for optimal cure speed and bond strength . The adhesive releases cyanoacrylate vapors during this air-curing window, which are the primary driver of odor and the leading cause of contact sensitization .
UV adhesive works completely differently. It contains photoinitiators that remain chemically inert until exposed to UV light at 365 nm or 405 nm wavelength . The adhesive does not begin curing until you activate the lamp. This gives you full control over curing timing—there is no race against humidity, no waiting for the glue to set, and no unpredictable results based on room conditions .
This UV lash adhesive curing guide covers the complete transition from traditional to UV systems. You‘ll learn the science, the step-by-step application SOP, and how to troubleshoot common retention issues.
For the business case behind switching to UV, see our ROI calculator for salons.
Professional UV lash lights with 395nm precision are essential for consistent 1-2 second curing.
2. UV Adhesive vs Traditional Glue: The Core Differences
Before diving into the SOP, understand what changes when you switch systems.
| Factor | UV Adhesive + UV Lamp | Traditional CA Glue |
|---|---|---|
| Activador de curas | Exposición UV (a la carta) | Humedad y tiempo |
| Cure time per bond | 1–3 segundos | Entre 5 y 30 segundos (dependiendo de la humedad) |
| Humidity sensitivity | Ninguna — la humedad no influye | Alta: requiere una humedad relativa de entre 45 y 65% |
| Fume / odor level | Muy bajo — vapores no curados mínimos | Notable: vapores liberados durante el secado al aire |
| Technician control | Alto: curarse exactamente cuando esté listo | Inferior — trabajando contra reloj |
| Service speed | Más rápido: sin esperas entre cada aplicación | Más lento: la tecnología espera a cada enlace |
| Shelf life (opened) | 4-8 semanas (almacenamiento a la sombra) | 4-6 semanas (con humedad y temperatura controladas) |
| Required equipment | UV curing lamp | No hace falta ninguna lámpara |
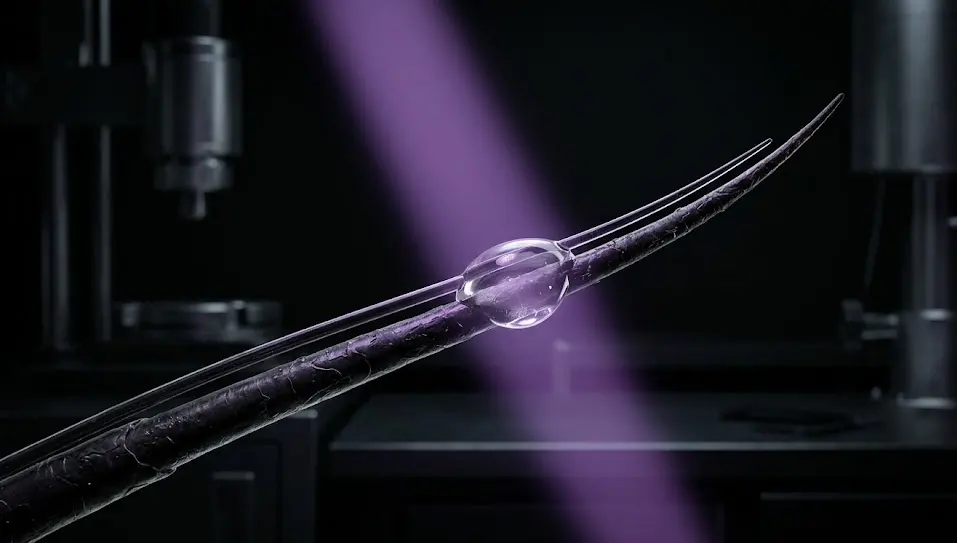
UV adhesive stays liquid until you activate the lamp, giving you total control over bonding time and preventing premature drying . The adhesive cures instantly and completely in 1–2 seconds at any temperature and humidity .
For salon owners, the time math is compelling. A full set of 80-120 lashes with traditional glue requires 16–24 minutes of dead time waiting for bonds to set. With UV adhesive, that time drops to 5–8 minutes—recovering over an hour of bookable time per day for studios running 4 full sets .
3. What You Need Before You Start
3.1 The Right UV Lamp
Choose a lamp that matches your adhesive‘s wavelength requirements. Most professional UV lash adhesives are formulated for 365 nm or 405 nm . Key technical specs to verify :
Wavelength match: Select a lamp that matches the adhesive‘s specified nm range
Irradiance (mW/cm²): Ensure sufficient power at working distance (typically 2–5 cm from the lash base). Professional lamps should deliver 50–200 mW/cm² for consistent 1–3 second cure times
Beam optics: Prefer lamps that concentrate light at the adhesion zone to shorten cure time and minimize stray UV on lids/skin
Safety certification: IEC 62471 photobiological safety is required for EU and most APAC market imports
3.2 The Right UV Adhesive
UV adhesives typically contain ethyl cyanoacrylate, polymethyl methacrylate, and photoinitiator compounds . Choose a formula suited to your application style
| Adhesive Type | Lo mejor para | Key Feature |
|---|---|---|
| Claro | All applications | Versatile, no color deposit |
| Negro | Volume lashes | Dark base, natural lash line appearance |
| Low-viscosity | Classic sets | Thin consistency, quick placement |
| Medium-viscosity | Volume and hybrid | Balanced flow and control |
When opened, UV adhesive has a shelf life of 1–2 months . Store it in the supplied pouch to protect from UV light . Avoid placing glue drops on shiny surfaces or in direct sunlight—reflected UV rays may accelerate curing prematurely .
Our UV lash light technical specs guide covers wavelength and irradiance in detail.]
Explore UV lash light wholesale options with matched adhesive compatibility.
4. Step-by-Step Application SOP
Adopt this as your training baseline. Adjust timing as your adhesive supplier recommends.
Step 1: Pre-Service Prep (5–7 minutes)
Client intake: Record lash health, density, oiliness, and any history of sensitivities
Limpieza: Use lash cleanser, rinse thoroughly, and pat dry completely. The lash line must be clean and fully dried before application. UV adhesive bonds best to a clean, oil-free surface
Prime (optional): Use primer only if oil and residue persist despite cleansing
Eye pad placement: Apply eye pads on the lower lashes; position silicone protective pads on the upper eyelid to shield from UV rays
Eye protection: Both client and technician must wear appropriate UV-blocking glasses (blocking UVA up to 400 nm) throughout the entire application
Configuración de la lámpara: Position the UV lamp so that the UV light can cure the adhesive areas. The distance is typically 10–20 cm (4–8 inches) from the lash line, with the light set so the lid margin of one eye is completely covered . Test the lamp on a guide card or your hand. Set timer preset (1–3 seconds) per adhesive spec
Quick pre-service checklist :
Client questionnaire and consent on file
Eye pads placed; eye protection fitted (client and technician)
Lash line cleaned and fully dried
Distancia de la lámpara probada en mano/tarjeta guía
Preajuste de temporizador seleccionado (según especificaciones del adhesivo)
Adhesive dispensed on a matte palette (avoid shiny surfaces)
Step 2: The Lash-by-Lash Cadence
This is the core of the UV application workflow. Repeat this sequence for every lash.
Isolate the natural lash — Use tweezers to separate the target natural lash from adjacent lashes
Dip the extension — Pick up a small amount of adhesive. Use a micro-bead approximately 1–2 mm in length . Be careful not to expose the glue droplet to UV light during application to prevent premature curing
Place the extension — Position the extension on the natural lash (top or underside per your technique) at the correct distance from the lash line
Cure immediately — Activate the UV lamp for 1–3 seconds . Do not delay between placement and curing. If the adhesive “skins over” before UV exposure, you will get a shell that looks set but lacks internal bond strength
Verify adhesion — Gently probe the bond to confirm it is secure, then proceed to the next lash
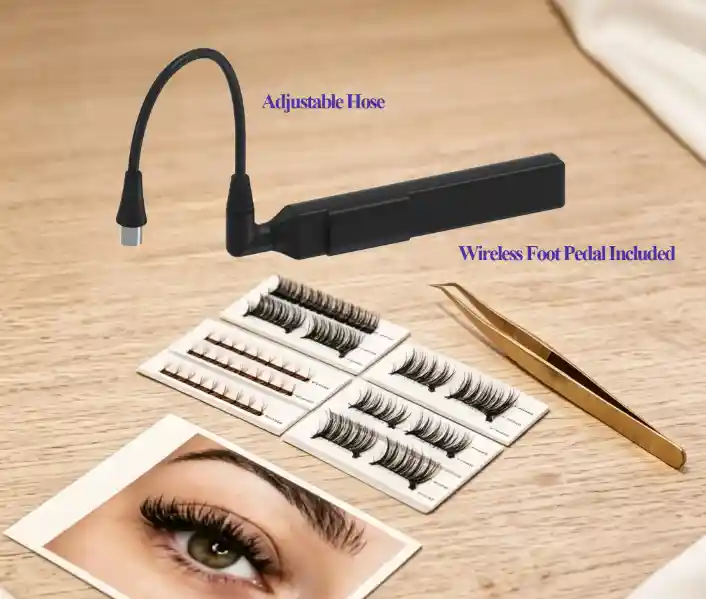
Consejo: Press the foot pedal to start the curing process. This is the most common activation method for professional UV lash systems . The adhesive cures in 1–2 seconds under UV light .
Step 3: Post-Cure Verification
Check for any “stickies” (lashes bonded together) — UV adhesive eliminates stickies because the cure is controlled
Gently brush through the full set to ensure all lashes are properly isolated
Reinforce aftercare instructions verbally and provide a printed card

5. Placement Techniques That Boost Retention
5.1 Underside vs. Topside Placement
Underside placement: Often improves mechanical interlock and protects the bond from frontal rubbing. This is the preferred method for many UV lash artists
Topside placement: Works well for classic sets but demands impeccable isolation to avoid stickies
5.2 Fan Fit and Fiber Count
Use a lash load chart to map safe fiber counts per natural lash diameter and health
Avoid bulky fans. No adhesive or lamp can compensate for an overloaded natural lash
5.3 Even Adhesive Spread
For premade fans, touch and micro-sweep the fan base approximately 1 mm before curing to ensure uniform distribution
Watch for “bulbs” or “burrs” at the base—signs of too much glue or poor spreading
6. Retention Troubleshooting Guide
Use this section to coach your team. Print it, laminate it, and keep it at each station.
Issue A: Early Fallouts (1–3 Days)
Causas probables :
Exposición UV insuficiente (tiempo, ángulo o distancia)
Shadows from hands or tools blocking the bond area
Adhesive “skinned over” before curing due to slow placement
Oversized fans for the client’s natural lash
Arregla :
Increase exposure time and/or intensity; realign the lamp to target the lash base
Train hand-lamp coordination; confirm no tools block the beam
Tighten the cadence: place → cure immediately (no delays)
Reajustar las dimensiones del ventilador para aumentar su resistencia; reducir el peso
Issue B: Ends Lift; Bond Feels “Crunchy” or “Brittle”
Causas probables :
Exceso de adhesivo que crea una cáscara gruesa y quebradiza
Cure applied while the extension was misaligned
Glue partially cured on the tray due to ambient UV light
Arregla :
Reducir el volumen de cola (microesferas verdaderas) y barrer ligeramente antes del curado
Hold the extension firmly during cure; ensure the correct placement angle
Mantenga el pegamento protegido de los rayos UV; sustituya las gotas con frecuencia.
Issue C: Great First Week, Then Retention Drops
Causas probables :
Client aftercare issues (oil, steam, rubbing)
Adhesive not fully polymerized internally (cure time too short)
La limpieza de la línea de las pestañas en los rellenos es irregular
Arregla :
Reinforce aftercare verbally + printed card; sell an appropriate lash cleanser
Add 0.5–1 second to curing time; verify with a gentle tug test
Institute a fill-time cleaning SOP
Issue D: Adhesive Appears Set but Pops Under Probe
Causas probables :
Intensidad UV demasiado baja a la distancia de trabajo
Mismatch between lamp wavelength and adhesive photoinitiator
Driver or power instability causing flicker during activation
Arregla :
Measure/confirm irradiance at the working distance (2–5 cm); increase intensity or reposition the lamp
Confirm wavelength spec for lamp and adhesive—they must match
Use a lamp with a stable driver; avoid products with false power labeling
7. Safety, Hygiene, and Lamp Maintenance
7.1 Eye Protection
Both client and technician must wear appropriate UV-blocking glasses throughout the entire application. Protective glasses should block UVA rays up to 400 nm and reduce blue light emission . Never look directly into the active UV light .
7.2 Skin and Mucosa Protection
Keep beams focused on the bond line only
Do not cure over exposed skin unnecessarily
For highly sensitive clients, use the lowest effective intensity and shortest proven exposure time
7.3 UV Adhesive Safety
UV adhesives are not allergen-free—they contain photoinitiators and acrylate resins that can sensitize some individuals . However, because curing is light-triggered rather than air-triggered, the uncured adhesive period is reduced from 5–30 seconds to under 3 seconds. This significantly reduces total vapor exposure per set .
Always perform a patch test if your client has a history of allergic reactions . UV adhesives release fewer irritating vapors than cyanoacrylate glues, but those with strong allergies may still react, though often with milder symptoms .
7.4 Lamp Maintenance
Clean lamp housings, arms, and shields daily with approved wipes
Avoid solvent contact with lenses or filters unless the manufacturer allows it
Track lamp hours; replace heads or arrays per manufacturer specifications
Inspect cables, joints, and clamps weekly for wear
8. Veredicto final
| Conclusión principal | Acción |
|---|---|
| UV adhesive cures on demand | Activate lamp only after placement, using foot pedal |
| Cure time | 1–3 seconds — no waiting between lashes |
| Humidity irrelevant | UV curing works regardless of room conditions |
| No post-service wait | Clients can get lashes wet immediately |
| Lower fumes | Reduced sensitization risk, better for allergy-prone clients |
| Retention troubleshooting | Use the Issue → Cause → Fix guide to coach your team |
| Protección ocular | Mandatory for both client and technician throughout application |
A UV lash adhesive curing guide is not complete without emphasizing the fundamental shift: you are no longer fighting humidity or racing against a clock. UV adhesive gives you control over every single bond. The technology eliminates the two biggest sources of inconsistency in traditional lash workflows: variable cure times and humidity dependence .
Start with the right lamp and matched adhesive. Follow the SOP. Use the troubleshooting guide to address issues early. Your application speed will improve. Your clients will appreciate the immediate return to activities. And your retention numbers will speak for themselves.
Una nota de Seminglight – Fabricamos productos profesionales Luces UV para pestañas con una precisión de longitud de onda de 395 nm y la certificación de seguridad IEC 62471. Explore our OEM Pegamento UV para pestañas collection for matched lamp-adhesive systems, or Contacto para precios al por mayor y soluciones OEM.
Jim Jiang

Fundador de Seming, diseñador jefe de productos con 20 años de experiencia. Especializado en personalización, innovación y soluciones de iluminación para iluminación fotográfica, iluminación de belleza y herramientas de belleza, y mucho más.