









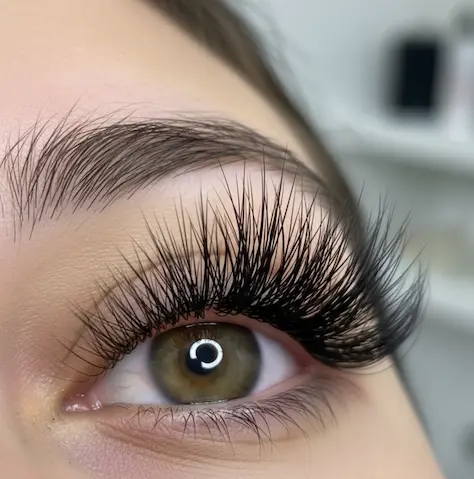
Part 1: The “Wispy” Phenomenon: Your Instagram Traffic Code
Let’s be honest. You’ve seen them.
You’re scrolling through your Instagram feed at 11 PM, and there they are. Those stunning, scroll-stopping sets of lashes. They’re not the uniform, perfect line of a traditional volume set. They’re feathery, textured, artistic, and just a little… wild. They are the sets that get thousands of likes. They are the sets that have clients flooding the comments with “I NEED THESE!” and “What city are you in?!”
They are Wispy Lash Extensions.
In the last two years, this single style—often called the “Kim K” look, “Textured Set,” or “Strip Lash Look”—has completely taken over the industry. It has become the undisputed gold standard for a high-end, artistic portfolio. It’s no longer just a trend; it’s a core competency.
It’s the traffic code for Instagram.
And that’s precisely where the frustration kicks in.
The Agony: Why Your “Wispy” Set Looks Messy (And Theirs Doesn’t)
You’re a talented artist. You’ve mastered your isolation. Your classic sets are clean. Your volume fans are fluffy. You decide to finally tackle the wispy look.
You spend two, maybe three, painstaking hours meticulously placing spikes and fans. You step back, and in person, it looks pretty good! You’re excited. This is the one.
Then you pull out your phone. You get your lighting just right. You switch to that unforgiving macro lens… and your heart just sinks into your shoes.
It just looks… messy.
The beautiful, long “spikes” you so carefully placed are leaning over, looking a bit drunk. They’re stuck to the shorter fans next to them. The roots don’t look clean. Instead of “intentionally textured,” your work just looks “unintentionally clumpy.”
It’s certainly not the “Instagram-worthy” shot you were hoping for. You end up deleting it from your camera roll, feeling completely defeated and wondering what secret you’re missing.
Here is the truth that separates the top-tier, “booked-out” artists from everyone else:
The secret to a viral-worthy wispy set isn’t just in the mapping. It’s a complete, three-part system.
It’s a workflow that involves:
- How you SEE your work.
- How you BUILD your work.
- How you SHOOT your work.
This is the ultimate guide to mastering wispy lash extensions. We’re not just going to give you the “how-to”—we’re going to give you the entire, uncensored blueprint. We’ll cover the theory, the mapping, and the technique.
But most importantly, we’re going to reveal the complete professional workflow—the system—that allows you to create those “pixel-perfect,” “zero-stickie” wispy sets that will finally make your portfolio look as professional as your skills… and get your books filled for months.
Part 2: What Are Wispy Lash Extensions?
Before we can master the technique, we have to be on the same page. What are we talking about?
Defining the Undefinable: It’s All About Texture
Wispy lash extensions are a free-form, advanced styling technique that mimics the look of a strip lash. The signature of this style is the noticeable contrast in lengths, creating a feathery, textured, and spiky appearance.
Unlike traditional sets that aim for a smooth, uniform top line, a wispy set celebrates its imperfections. It’s built from two key components:
- “Spikes”: These are the stars of the show. They are longer, often closed fans (or thick classic lashes) that are placed at strategic points across the lid to create the primary “wispy” effect.
- “Fans”: This is the supporting cast. These are shorter, lighter, and wider volume fans that fill all the gaps between the spikes, creating a full, dark, and fluffy base.
The “Kim K” nickname came from, you guessed it, Kim Kardashian, whose makeup artist famously applied individual cluster lashes of varying lengths to create that signature, perfectly-imperfect look. We, as lash artists, have simply figured out how to recreate that look on a semi-permanent basis.
Wispy vs. Hybrid vs. Volume: A Quick Breakdown
Let’s clear this up, because many clients (and even new artists) get confused.
- Classic Lashes: The original. One single extension is applied to one single natural lash (1:1 ratio). The result is a natural, “mascara” look.
- Volume Lashes: The dense, dark look. A handmade “fan” of 2-15 very fine extensions is created and applied to one single natural lash. The goal here is fullness and a perfectly uniform, dark lash line.
- Hybrid Lashes: The 50/50 split. This is a mix of Classic lashes and Volume fans, giving a “fuller than classic, but not as dramatic as volume” look.
- Wispy Lashes (Textured Volume): This is an advanced form of Volume. It uses only volume fans (or a mix of closed fans and open fans), but it intentionally breaks all the rules of uniformity. It uses different lengths, curls, and densities to create dramatic peaks and valleys.
A “Wispy Hybrid” set is also very popular, where an artist will mix classic lashes, volume fans, and longer spikes. But a true, high-impact wispy volume set is the one you see dominating Instagram.
Who is the Perfect Client for Wispy Lashes?
This style is a powerhouse, but it’s not for everyone.
Ideal Candidates:
- The Client with Healthy, Dense Lashes: A wispy set needs a good base to build upon. The contrast between the short fans and long spikes is most dramatic when you have a full lash line to work with.
- The Client with Almond or Hooded Eyes: The spikes can work magic to open up the eye. For hooded eyes, placing the longest spikes right at the arch of the brow can create an incredible lifting effect.
- The “Strip Lash” Addict: Your client who comes in showing you a picture of a full, fluffy strip lash is the perfect person to upsell to a wispy set. This is the look they’ve always wanted.
Who to Be Cautious With:
- Clients with Very Sparse or Weak Lashes: A wispy set requires a lot of natural lashes to support both the fans and the spikes. On a sparse lash line, the spikes can look less “intentional” and more “gappy.”
- Clients with Very Curly Lashes: The spikes can get lost or tangled in extremely curly natural lashes, making the “clean” separation almost impossible to achieve.
- The “Natural” Client: A client who just wants a little “boost” will be overwhelmed by a wispy set. Stick to Classic or light Hybrid for them.
Part 3: The Blueprint: How to Master Wispy Lash Mapping
Okay, class is in session. This is the part where we move from theory to practice. A wispy lash map is an artist’s recipe. Get the ingredients right, and the set will sing.
The “Recipe”: Spikes & Fans
Your entire set will be a dance between these two elements.
Anatomy of “The Spike”: The Soul of the Look
The spikes are your showstoppers. They are the first thing you should apply, as they are the anchors for your entire design.
- What to use: You have two options.
- Closed Fans (Recommended): This is the most popular and professional method. Grab 5-10 very fine lashes (e.g., 0.03mm or 0.05mm), but instead of fanning them open, keep the tips perfectly together. Dip the base in adhesive. This creates a bold, dark spike that is still lightweight and safe for the natural lash.
- Thick Classic Lashes: Some artists use a single thick lash (e.g., 0.15mm or 0.20mm), but this is generally not recommended. It’s much heavier for the natural lash and can look “plasticky” and dated compared to the soft-yet-bold look of a closed fan.
- Length: Your spikes should be 2mm to 4mm longer than the main “base” fans you’ll be filling in with. (e.g., If your base is 10mm, your spike will be 12mm or 13mm).
- Curl: To make them stand out even more, your spikes should often be one curl stronger than your base fans. For example, use D-curl spikes over a C-curl base.
- Placement: Apply your spikes first. Place them on the top layer of lashes, about 1-2mm apart from each other, following the map you’ve chosen.
Anatomy of “The Fan”: The Body and Fullness
The fans are your supporting cast. Their job is to create a dark, fluffy, and dense background that makes the spikes “pop.”
- What to use: These should be light, wide, and airy fans. Think 3D-6D using 0.05mm or 0.07mm lashes. Don’t go too heavy—the star of the show is the texture, not the density.
- Length: As mentioned, these will be 2-4mm shorter than the spikes in the same section.
- Curl: Often one step “weaker” than the spikes (e.g., C-curl fans if you used D-curl spikes). This enhances the separation.
- Placement: After all your spikes are in place, you go back in and fill all the gaps on the middle and bottom layers of lashes with these shorter fans.
3 Professional Wispy Lash Maps You Can Use Today
Don’t just guess. Use a map. Here are three of the most popular and effective maps to get you started. (Remember: “S” = Spike Length, “B” = Base Fan Length).
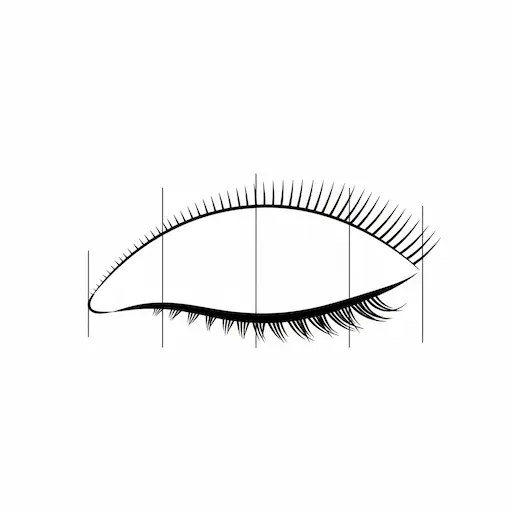
Map 1: The Classic “Kim K” (Squirrel Wispy)
This map places the longest lengths at the arch of the brow, opening the eye up wide. It’s the most requested and universally flattering wispy map.
- Inner Corner: S: 9mm / B: 7mm
- Inner Mid: S: 11mm / B: 9mm
- Mid (Arch): S: 13mm / B: 11mm
- Outer Mid: S: 12mm / B: 10mm
- Outer Corner: S: 10mm / B: 8mm
(Place spikes 1.5-2mm apart, then fill all gaps with base fans)
Map 2: The Dramatic “Cat-Eye Wispy”
This map focuses the length on the outer half of the eye, creating a dramatic, elongated, winged effect.
- Inner Corner: S: 8mm / B: 6mm
- Inner Mid: S: 10mm / B: 8mm
- Mid: S: 12mm / B: 10mm
- Outer Mid: S: 14mm / B: 12mm
- Outer Corner: S: 13mm / B: 11mm
(Be careful not to go too long on the very outer corner, as those lashes are weakest. Stop 2-3mm from the absolute end.)
Map 3: The Subtle “Angel Wispy” (Wet Look)
This is a softer, more ethereal look. It uses only closed fans (spikes) of varying lengths and no open fans at all. It gives that “wet lash” or “angelic” texture.
- Map: Use a standard Cat-Eye or Squirrel map (e.g., 8mm, 9mm, 10mm, 11mm, 12mm).
- Technique: Apply 4D-6D closed fans (0.03mm or 0.05mm) to every single lash. Intentionally mix up the lengths in each section. For example, in the 10mm section, place a mix of 9mm, 10mm, and 11mm spikes randomly to create that perfect, piece-y texture.
Part 4: The “Viral-Worthy” Workflow (Part I: The Foundation)
You’ve got the map. You’ve got the theory. You’re ready to create your masterpiece.
Not so fast.
Let’s talk about the first, and most overlooked, reason your sets aren’t “Instagram-worthy.”
The First Failure: You Can’t Build What You Can’t See
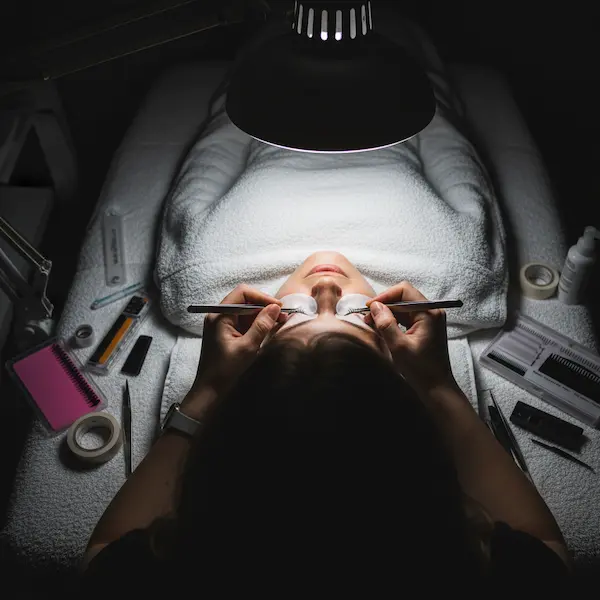
We’ve all been there. You’re deep into a set, your neck is starting to ache, and you think your isolation is perfect. But under that single, harsh overhead lamp or that basic ring light, your own hands are casting shadows. The client’s brow bone is casting shadows. You’re essentially working in a valley of darkness.
What you can’t see is killing your work.
You’re missing those tiny, translucent “v-lulu” baby hairs, which later get stuck to your fans. You’re not quite getting 100% isolation, resulting in stickies. Your placement isn’t exactly 0.5mm from the lash line, because you can’t really tell where it is.
In a regular set, you might get away with it. But in a wispy set, where clean separation is everything, these tiny mistakes add up. And under a macro lens, they look like giant, glaring errors.
The Solution: Surgical-Grade Illumination
Before you can even think about building, you have to see. You need to eliminate every single shadow from your workspace. You need to see the lash line with the same clarity as a surgeon.
This is not a job for a desk lamp or a basic beauty ring light. This is the foundation of your entire craft.
Product Intro: The Seming Double Arm Light
This is where professional artists make their first critical investment. You need a dedicated eyelash illumination lamp designed for this specific, intricate task.
A lamp like the Seming Double Arm Light is the industry standard for a reason. Its dual-arm design allows you to position the light on both sides of the client’s face, creating a completely shadowless field.

When you flick this light on, it’s like the world goes from standard definition to 4K.
- No More Shadows: Your hands, your tweezers… they cast no shadows over your work.
- Daylight Brightness: The cool, white (5600K) light mimics natural daylight, so you see every lash’s true color and texture.
- Find Every Lash: Suddenly, you can see those “invisible” baby lashes. You can achieve 100% isolation, every single time.
The takeaway: You cannot build a “pixel-perfect” set if you can’t see the pixels. The Seming Double Arm Light is the foundational tool that makes “clean work” possible.
Part 5: The “Viral-Worthy” Workflow (Part II: The Secret)
Okay, you’ve done it. You’ve invested in your Double Arm Light. Your workspace is now a brilliant, shadow-free stage. You can see everything. Your isolation is perfect.
You place your 13mm spike. You place your 11mm fan right next to it.
You move on.
You come back five minutes later… and they’re stuck together.
What is going on?
The Second Failure: The “Tacky Window”
Welcome to the most frustrating, least-talked-about villain in the lash industry: The “Tacky Window.”
Let’s talk about how your traditional lash glue actually works.
When you dip your fan, the glue is liquid. When you place it, it “grabs” the natural lash in about 1-2 seconds. This is what we call “attachment time.”
But is it cured? Not even close.
It is now in a “tacky” or “gummy” state. It’s not fully solid. This semi-cured state—the Tacky Window—can last for several minutes. The full polymerization (the bond reaching maximum strength and becoming waterproof) takes 24-48 hours.
This “Tacky Window” is the single greatest enemy of a clean lash application, especially for wispy sets.
The Physics of a “Failed” Wispy Set
Let’s replay the tape, but this time, let’s watch what the glue is doing.
- Placement: You place your 13mm spike (a 7D closed fan) on a natural lash. It grabs in one second. It looks perfect.
- The “Drift”: You move on. You go to the lash right next to it (with your perfect isolation, thanks to your Clarity lamp) to place an 11mm base fan. While you’re doing this, that 13mm spike, still in its “Tacky Window,” isn’t perfectly rigid. It drifts. It leans just a fraction of a millimeter.
- The “Clump”: You place your 11mm fan. The base is clean, but the tips of this new fan are now dangerously close to the still-tacky 13mm spike. A tiny bit of static, a slight movement from the client, and poof—the tip of the fan and the side of the spike are now lightly stuck together.
- The Cascade Effect: You continue working. You don’t even see the tiny connection. But 10 minutes later, you comb through the set, and that light connection pulls the spike, breaking its bond from the natural lash, or it pulls the fan, clumping them together.
By the end of the appointment, your once-perfect map has been sabotaged by hundreds of these micro-stickies. You’ve created a “sticky” set. And under a macro lens, “sticky” just looks “dirty.”
You’ve been blaming your camera, your lighting, or your shaky hands. But the culprit has been your glue’s curing process all along.
The Solution: “Point-Welding” Your Art
So, how do the top artists—the ones with those crystal-clear, “zero-stickie” macro shots—do it?
They’ve changed the rules of the game. They’ve eliminated the “Tacky Window” entirely.
What if you could place that 13mm spike and, instead of it taking 24 hours to fully cure, it could be 100% cured, waterproof, and rock-solid… in 2-3 seconds?
What if you could “lock” it into its perfect, upright position before you even thought about isolating the next lash?
This isn’t theory. This is the reality of UV LED curing technology.
Product Intro: The SM247 Tweezer UV Lamp
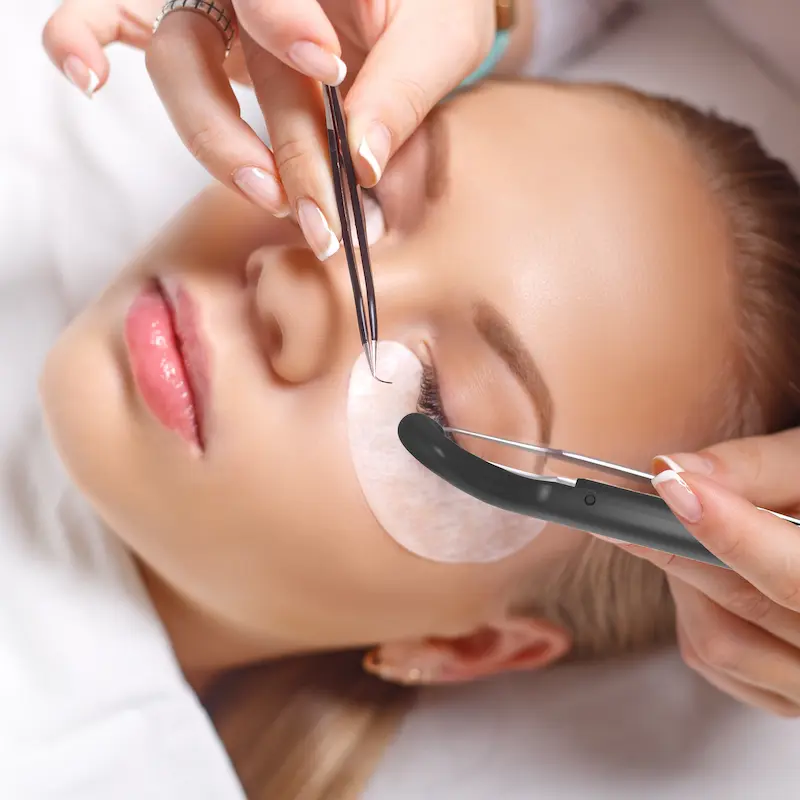
This is the secret weapon. This is the tool that separates the pros from the masters. The Tweezer UV Lamp is not just another light; it’s a fundamental change to your entire workflow.
It works with a special adhesive that contains a photoinitiator. This adhesive will never cure on its own. It stays in its perfect, liquid state until you’re ready. Then, when you apply the focused LED light from the lamp, it triggers an instant polymerization.
Let’s re-frame this. This isn’t a “lamp.” This is a “Point-Welder” for your art.
The name “Tweezer UV Lamp” is intentional. It’s designed to be used with the same precision as your isolation tweezers. You are targeting a single bond and locking it on command.
The “Zero-Stickie” Workflow: How It Works
This is how you build a “macro-proof” wispy set. This new workflow eliminates all the guesswork and chaos.
- Step 1: Place Your Spike. You isolate your natural lash (which is easy, thanks to your Double Arm Light). You pick up your 7D, 13mm closed fan spike. You dip it in the UV adhesive. You place it perfectly on the top layer of lashes. You have all the time in the world. The glue isn’t drying. You can adjust the angle. You can make it flawless.
- Step 2: “Weld” Your Spike. Once it’s in the perfect position, you hover the Tweezer UV Lamp over the bond and tap your foot pedal. You hold the light for 2-3 seconds. Click.(want a deeper dive on how UV lash tech works?)
- Step 3: It Is Done. That spike is now 100% fully cured. It is not tacky. It is not gummy. It is a rigid, lightweight, perfectly placed anchor. It is waterproof. It cannot be moved. It cannot drift.
- Step 4: Fill with Impunity. Now, you move to the lash right next to it. You create your 11mm base fan. You place it. You don’t have to worry at all about it sticking to the spike you just placed. It’s physically impossible. You “weld” this fan in place in 2-3 seconds.
- Step 5: Repeat. You move from lash to lash, building your masterpiece, one perfectly cured, 100% separated bond at a time.
You are no longer a lash artist racing against glue. You are a sculptor, deliberately building a structure, one secure piece at a time.
Part 6: The “Viral-Worthy” Workflow (Part III: The Payoff)
You’ve done it.
You used your [Clarity Pro Duo] to see every lash.
You used your SM247 Tweezer UV Lamp to build a “zero-stickie,” perfectly separated wispy set.
The client sits up. It is, without a doubt, the cleanest, most beautiful set you’ve ever created.
You’re vibrating with excitement. You grab your iPhone, snap a picture, and…
It’s dark. It’s grainy. It has weird, ugly shadows under the brow, and the color looks a bit… yellow. The photo does not do your work justice. Your masterpiece, once again, is ruined by the final step.
The Final Failure: The “Photo Finish” Flop
Your client is now sitting up. Your amazing overhead Double Arm Light is now behind them. The light in your room is a standard, warm-toned ceiling light.
You’re trying to take a photo in a low-light, “mixed lighting” situation.
- Your phone’s camera slows its shutter speed to compensate, resulting in a blurry, grainy image.
- The “warm” (yellow) light from the room lamp makes the eye-whites look dull and the skin tone look “off.”
- The light from above casts a huge, ugly shadow from the client’s brow bone directly onto your beautiful lash line, hiding all the detail.
You’ve created a $300 set of lashes, and you’ve taken a $30 photo. You can’t post this.
The Solution: Painting with Light
You don’t need a $5,000 DSLR camera. You just need to control the light.
Your phone’s camera is incredibly powerful, if you give it enough high-quality, front-facing light. This is the final step of the workflow: Professional Photography Lighting.
This is not the same as your work light. This is a light designed specifically for one purpose: to capture a flawless, shadowless, and bright image.
Product Intro: The Seming Pro Ring Light
This is the tool that makes your work look as expensive as it is. A professional-grade [Seming Pro Ring Light] is the industry standard for portfolio photography.
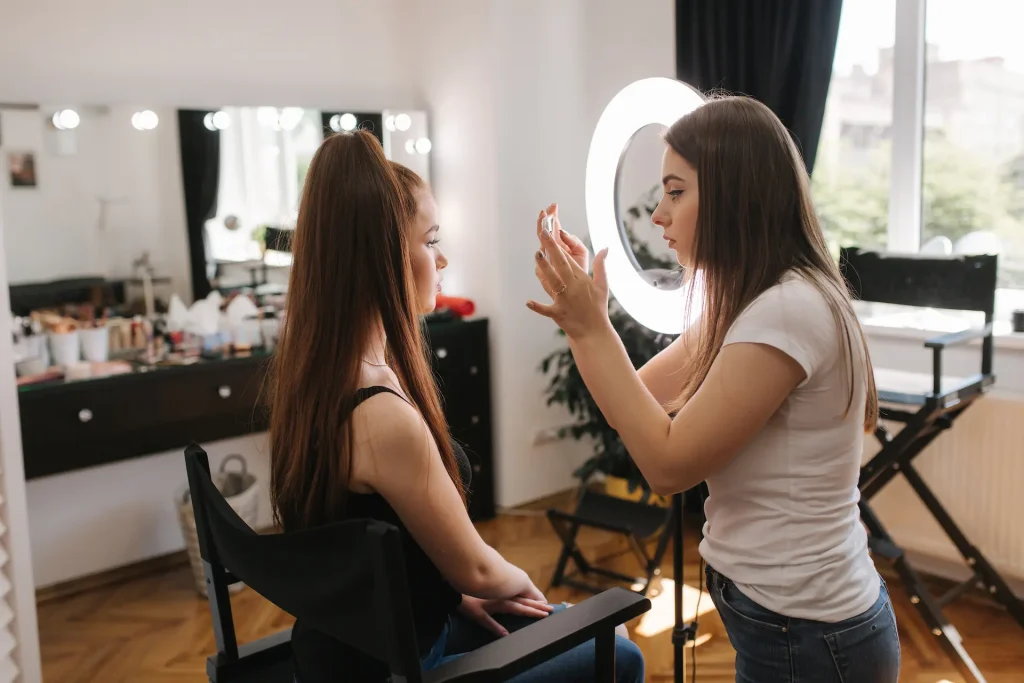
This is how you use it to win:
- Set It Up: Place the ring light on its tripod directly in front of the client.
- Adjust the Color: This is crucial. You must set the color temperature to the “cool white” or “daylight” setting (around 5600K). This cool tone makes the whites of the eyes pop, makes the black lashes look darker and crisper, and gives the photo a clean, clinical, “pro” feel.
- Adjust the Brightness: Turn the dimmer up until the face is brightly illuminated.
- Shoot Through the Hole: Place your smartphone camera inside the ring. This is the secret. By shooting through the center of the light source, you create a perfectly even, shadowless illumination. All those ugly brow shadows are instantly gone.
- Get the “Angel Eye”: As a bonus, the ring light will create that beautiful, circular “catchlight” in the client’s pupil. This “angel eye” effect is a subconscious signal to viewers that this is a professional, high-quality photograph.
The result? A bright, crisp, shadow-free, perfectly color-balanced photo that shows off every… single… detail… of your “zero-stickie” masterpiece.
Part 7: Conclusion: Your Complete “Instagram-Famous” System
So, let’s zoom out.
You’ve been looking at those “viral-worthy” wispy sets on Instagram and wondering, “What is their secret?”
The secret is that it’s not a secret. It’s a system.
It’s not one tool, one trick, or just “good luck.” It’s an end-to-end professional workflow that leaves nothing to chance. It’s about removing every variable that could possibly lead to a messy, unprofessional result.
And now you have the blueprint for that system:
- THE FOUNDATION: You See Perfection. You start with a professional illumination lamp like the Seming Double Arm Light to create a shadowless, surgical-grade workspace. You can’t build what you can’t see.
- THE BUILD: You Create Perfection. You use a revolutionary tool like the SM247 Tweezer UV Lamp to “point-weld” each spike and fan. You eliminate the “Tacky Window,” making “stickies” a physical impossibility and locking in your art.
- THE PAYOFF: You Capture Perfection. You finish by using a photography light like the Seming Pro Ring Light to take a bright, shadowless, “angel eye” photo that proves the quality of your work to the world.
Stop blaming your camera. Stop being frustrated by your glue. Stop squinting under a bad light.
Your artistry is already there. You just need the professional workflow to match it.
It’s time to stop being just another lash artist and start becoming the expert your clients are searching for. It’s time to build a portfolio that doesn’t just show your work, but sells it for you.
Ready to build your complete “Viral-Worthy” workflow? Your talent deserves the right tools. Visit seminglight.com to explore the complete professional system that will take your art from “good” to “Instagram-famous.”